If your kids like hands-on activities that involve food, they are going to love this edible DNA model. Use this edible science experiment to teach your kids about DNA, the double helix, and basic genetics. Take what you’ve learned and apply it to a science project (including a science fair project) or a fun STEM activity.
STEM activities of all kinds are good to include in your lessons because they are so educational, versatile, and just downright fun! Hands-on activities are good for bringing some fun into your day, plus they are especially beneficial to kids who are kinesthetic learners. Actually, many learning styles can benefit from STEM activities like this because so many elements of learning are included.

The Science Behind the Candy DNA Model
DNA [Deoxyribonucleic Acid] is the genetic blueprint of a life-form and it has the ability to encode and pass on the information on how to grow and maintain that life-form. In simpler form, DNA stores the recipe for the life or an organism.
This project is a fun alternative to the standard lesson about the structure of Deoxyribonucleic Acid. Having your kids create this model is not just a more child-friendly, easy-going way to teach this lesson, but it also helps them to truly appreciate the double-helix structure of DNA and the base pairs A-T and G-C within it!
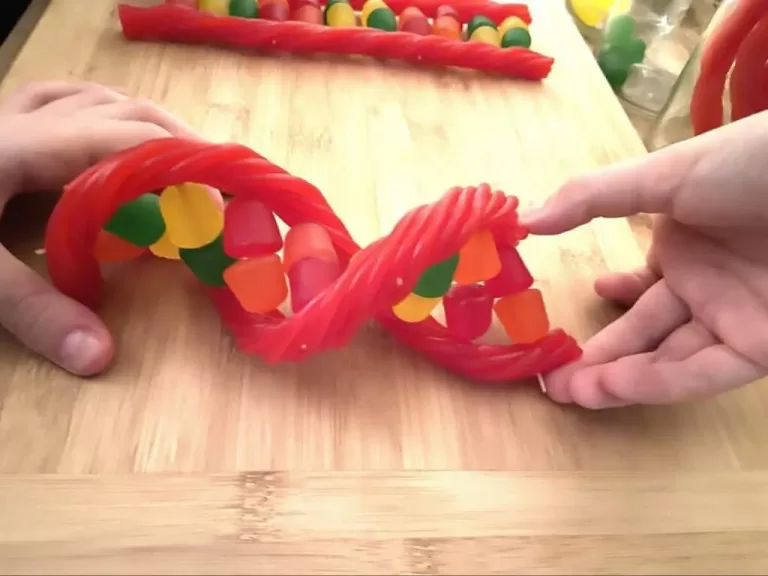
This model is assembled initially as a flat, 2-D diagram of DNA, then your children can twist the completed project to learn more about the double-helix shape in a 3-D version!
FUN FACT: Human DNA is 99.9% identical in each person you see, meet, or are involved with. Each human has a unique DNA sequence that makes all of us VERY different! How cool is THAT?!
Put down your textbooks and pick up the candy for this fun & educational STEM activity!
The order in which these bases are in determines the DNA’s genetic code, or instructions. Each string of amazing DNA carries these instructions called “genes”. Genes tell a cell how to make certain proteins that are used by the cell to grow and survive. These genes are also passed down from generation to generation.
Have you ever wondered why you might get told something like, “You look so much like your _______?” Why and how does this happen exactly? GENES are the answer!
More About DNA and Genetics
DNA [Deoxyribonucleic Acid] is made up of certain molecules called “nucleotides”. Each of these nucleotides contains a PHOSPHATE GROUP, which contains a sugar group and a nitrogen base.
The Four Types of Nitrogen Bases are as Follows:
[A] = ADENINE [We used YELLOW Dots here.]
[T] = THYMINE [We used GREEN Dots here.]
[G] = GUANINE [We used ORANGE Dots here.]
[C] = CYTOSINE [We used RED Dots here.]
The order in which these bases are in determines the DNA’s genetic code, or instructions. Each string of amazing DNA carries these instructions called “genes”. Genes tell a cell how to make certain proteins that are used by the cell to grow and survive. These genes are also passed down from generation to generation.
Have you ever wondered why you might get told something like, “You look so much like your _______?” Why and how does this happen exactly? GENES are the answer!
There are Certain Base Rules:
ADENINE [A] & THYMINE [T] are always paired together.
GUANINE [G] & CYTOSINE [C] are always paired together.
This can easily be taught to your kids by assigning each one of them a certain colored candy and making sure to remind them of this fact before the start of the construction phase. The wooden toothpicks in this activity are used to show the binding forces!
Getting Started on the Candy DNA Model
Total time needed for this project is approximately 20-40 minutes.
- Optional: We have prepared a Worksheet for your kids to colour and complete.
- Download Worksheet – Part 1 – Part 2 –
In the image below you can look at an example of a coloured worksheet.

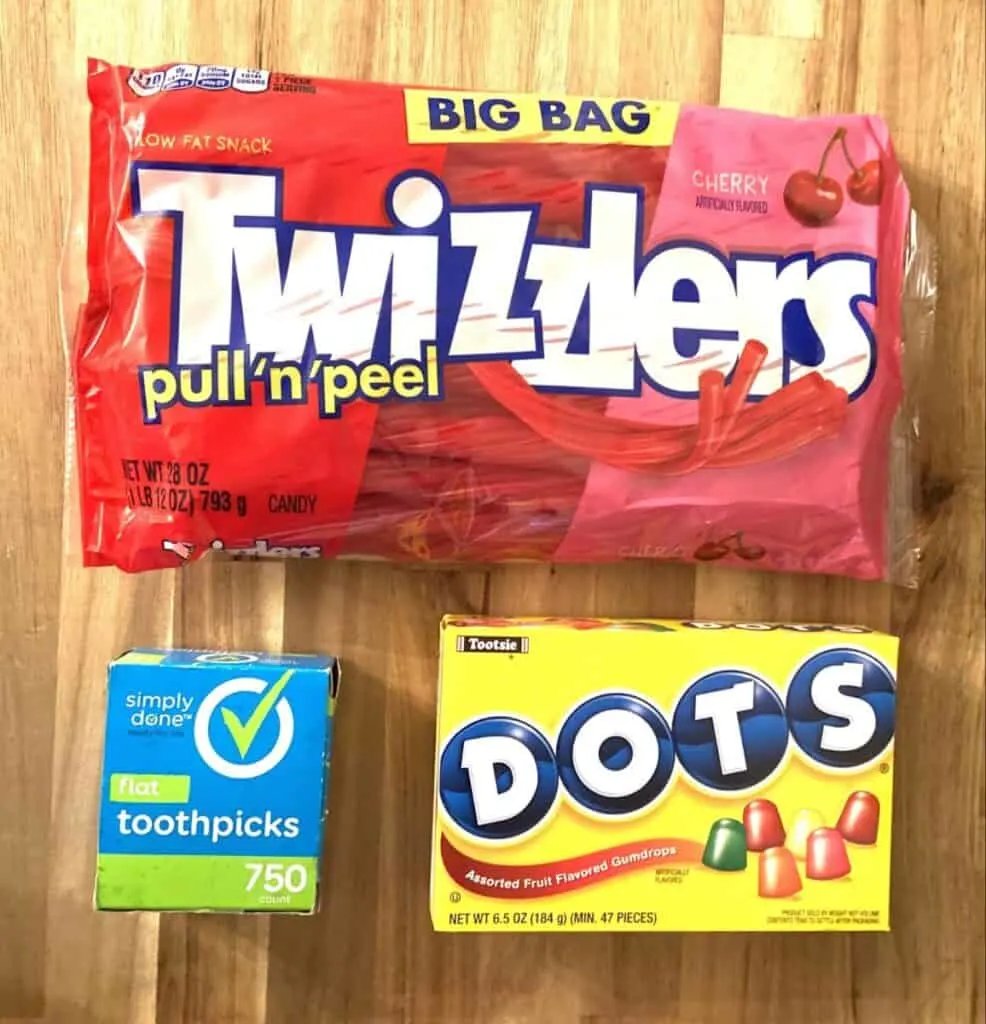
Ingredients
- TWIZZLERS CANDY [Or some other type of long rope or licorice type candy]
- SOFT CANDY THAT COMES IN 4 COLORS [You need a candy that has at least 6-10 pieces each – we used DOTS but gum drops or something similar would work nicely. Colored marshmallows are also a good option.]
- WOODEN TOOTHPICKS
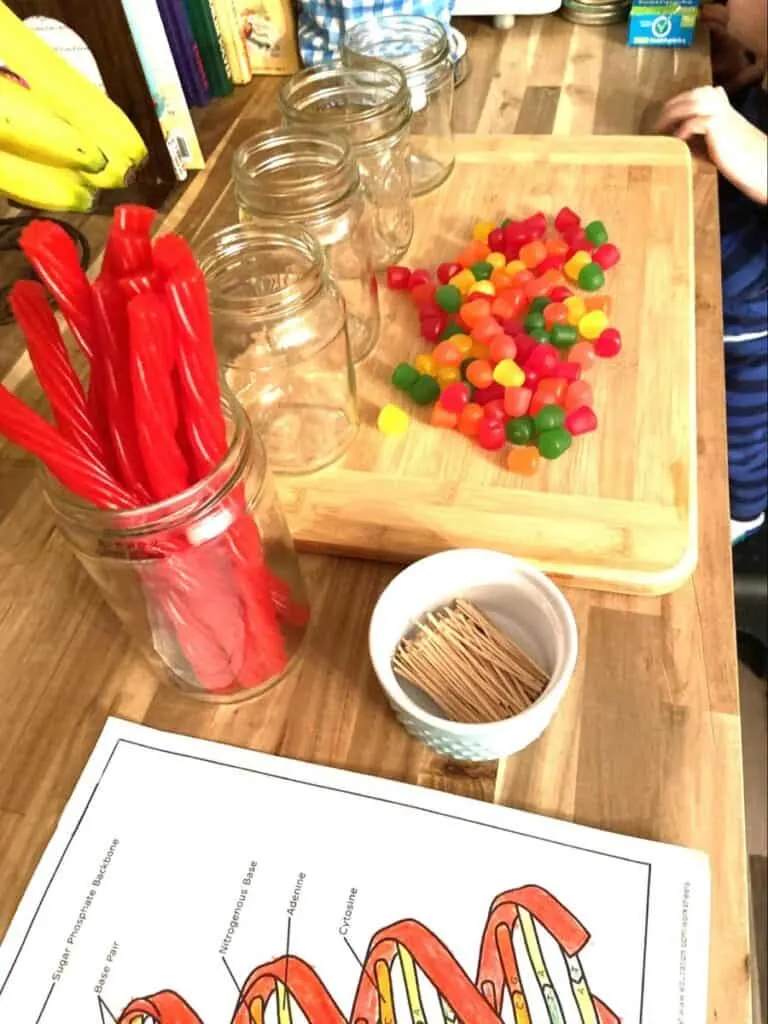
- 4 DIFFERENT CUPS OR BOWLS FOR SEPARATING THE SOFT CANDY [We used glass jars, and I even put the Twizzlers in one and had one for some “extras for snacking purposes”, but any bowls or cups would work here.]
Project Instructions – Separating and Sorting

- You’ll want to separate your 4 colors of the soft candy into different cups or bowls.
- Assign each of the colors a specific nucleotide. [If you chose to have your kids color the DNA model coloring sheet first, you could try to have these in corresponding colors to keep the consistency.]
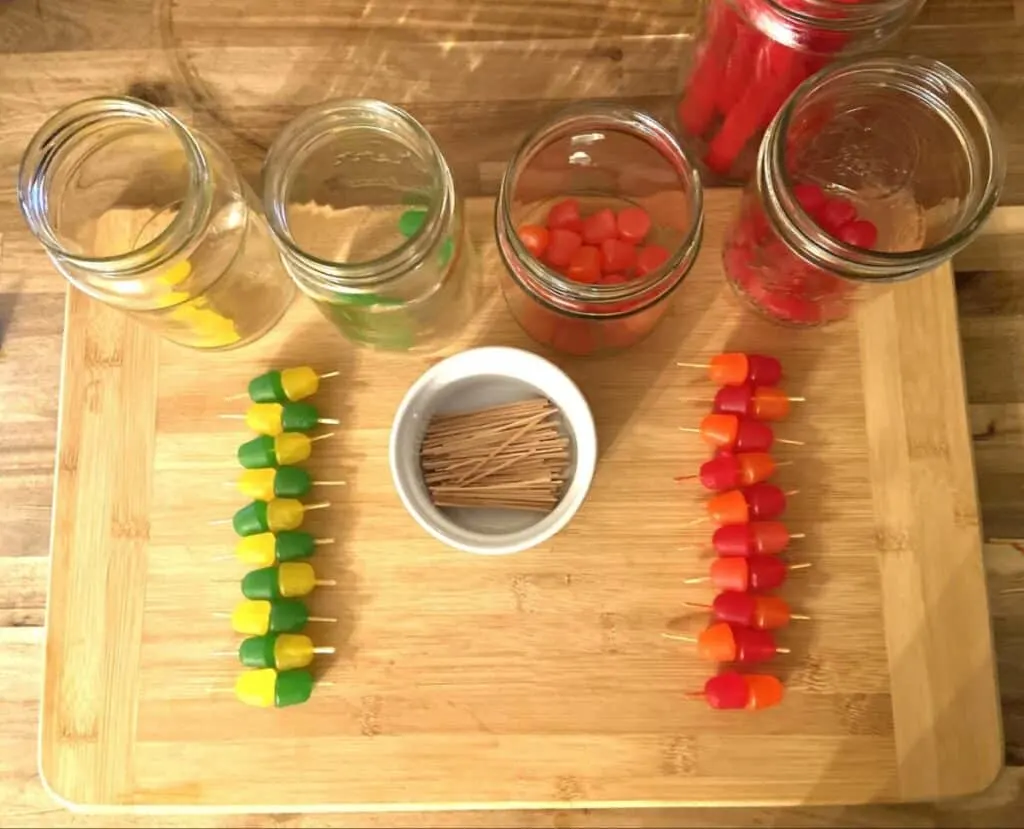
Project Instructions – Constructing Your Base Pairs
- First, it is important to make sure that you remember which nucleotides are to be paired together and then put the two colored candy cups or bowls with their buddy before starting this step.
- Then choose the order for your base pairs and lay them out onto your workspace in the order you chose.
- Bring on the toothpicks! Start putting your soft candies on the toothpicks in sets of two, one on each end.
- Continue doing this until you’ve used all of the nucleotides you set up in your sequence pairs.
Project Instruction – Assembling Your 2D DNA Model
- Once you have the number of desired base pairs for your DNA model constructed, you may want to lay them out in the order you’re going to be attaching them to your “backbone pieces”.

Project Instructions Turning Your Edible DNA Model into a 3D Double Helix
- Now for the coolest part! Once you have your 2D model [or models] completed, compare them with your colored DNA model [if you chose to do this part].
- Then grab both ends of your model and slightly twist them in opposite directions to create YOUR VERY OWN DNA DOUBLE-HELIX!